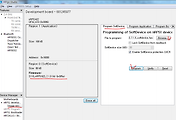
예제명이 blinky_rtx라길래 uart로 led 제어하는 줄 알았는데, 전혀 상관없네요.^^;;
RTX는 CMSIS-RTOS라고 하네요.
어쨌든 이번 예제는 RTX를 이용한 LED 블링크입니다.
LED 하나는 스레드를 이용하고, LED하나는 timer를 이용해서 서로 다른 interval로 블링크합니다.
main.c
1 2 3 4 5 6 7 8 9 10 11 12 13 14 15 16 17 18 | #define OUTPUT_0_INTERVAL 100 /**< BSP_LED_0 toggle interval (ms). */ #define OUTPUT_1_INTERVAL 400 /**< BSP_LED_1 toggle interval (ms). */ #ifdef BSP_LED_0 #define GPIO_OUTPUT_0 BSP_LED_0 /**< Pin number for output. */ #endif #ifndef GPIO_OUTPUT_0 #error "Please indicate output pin" #endif #ifdef BSP_LED_1 #define GPIO_OUTPUT_1 BSP_LED_1 /**< Pin number for output. */ #endif #ifndef GPIO_OUTPUT_1 #error "Please indicate output pin" #endif #define SIGNAL_OUTPUT_1_TOGGLE 0x01 /**< ID of signal sended to blinky_thread. */ | cs |
define 부분입니다.
1~2 : LED blink를 위한 interval
4~16 : LED 1과 LED 2 define해주는 부분.
BSP_LED_0과 BSP_LED_1은 pca10028.h에 define되어 있습니다.
18 : 아래의 blinky_thread에서 이전 함수의 동작이 끝났는지를 확인하는 flag인 것 같습니다.
1 2 3 4 5 6 7 8 9 10 11 12 13 14 15 16 17 18 19 20 21 22 23 24 25 26 27 28 | int main(void) { osThreadId blinky_thread_id; osTimerId led_toggle_timer_id; osStatus status; // Configure LED-pins as outputs nrf_gpio_cfg_output(GPIO_OUTPUT_0); nrf_gpio_cfg_output(GPIO_OUTPUT_1); blinky_thread_id = osThreadCreate(osThread(blinky_thread), NULL); led_toggle_timer_id = osTimerCreate(osTimer(led_toggle_timer), osTimerPeriodic, NULL); status = osTimerStart(led_toggle_timer_id, OUTPUT_1_INTERVAL); if ((blinky_thread_id == NULL) || (status != osOK)) // handle thread creation and starting timer { while (true) { // do nothing, error } } while (true) { UNUSED_VARIABLE(osSignalSet(blinky_thread_id, SIGNAL_OUTPUT_1_TOGGLE)); UNUSED_VARIABLE(osDelay(OUTPUT_0_INTERVAL)); } } | cs |
Line 3~5, 11~13 : Thread와 Timer등을 만들어주는 부분입니다.
osThreadCreate, osTimerCreate, osTimerStart는 cmsis_os.h에 define되어 있습니다.
간단히 설명하면
osThreadCreate(osThread(생성할 스레드명), NULL);
osTimerCreate(osThread(생성할 타이머명),타이머 종류, NULL);
osTimerStart(create된 타이머 id, 타이머 interval);
1 2 3 | osThreadId osThreadCreate (const osThreadDef_t *thread_def, void *argument); osTimerId osTimerCreate (const osTimerDef_t *timer_def, os_timer_type type, void *argument); osStatus osTimerStart (osTimerId timer_id, uint32_t millisec); | cs |
Line 15~21 : 아직 스레드가 생성되지 않았거나 타이머가 동작하지 않으면 error를 띄워주기 위해 만들어 놓은 부분
Line 23~27 : 이부분이 loop로 계속 돌아가는 부분입니다.
UNUSED_VARIABLE은 nordic_common.h에 define 되어있습니다.
define을 보면 그 안의 함수를 실행하는 듯 합니다.(자세히 아시는 분 답변좀~)
1 2 | #define UNUSED_VARIABLE(X) ((void)(X)) #define UNUSED_PARAMETER(X) UNUSED_VARIABLE(X) | cs |
osSignalSet과 osDelay는 cmsis_os.h에 define 되어있습니다.
1 2 3 4 5 6 7 8 9 10 11 12 13 14 15 16 17 18 19 20 21 22 23 24 25 26 27 | void blinky_thread(void const * arg); /**< Prototype of blinky_thread. */ osThreadDef(blinky_thread, osPriorityAboveNormal, 1, 0); /**< Definition of blinky_thread */ void led_toggle_timer_handler(void const * arg); /**< Prototype of timer callback function. */ osTimerDef(led_toggle_timer, led_toggle_timer_handler); /**< Definition of timer callback function. */ void blinky_thread(void const * arg) { UNUSED_PARAMETER(arg); osEvent evt; while (true) { evt = osSignalWait(SIGNAL_OUTPUT_1_TOGGLE, osWaitForever); if (evt.status == osEventSignal) { nrf_gpio_pin_toggle(GPIO_OUTPUT_1); } } } void led_toggle_timer_handler(void const * arg) { UNUSED_PARAMETER(arg); nrf_gpio_pin_toggle(GPIO_OUTPUT_0); } | cs |
이 부분이 실질적인 스레드와 타이머 함수 부분입니다.
1~2 : LED_1을 위한 blinky thread 부분입니다.
osThreadDef는 cmsis_os.h에 define 되어있습니다.
osThreadDef(스레드이름,우선순위,스레드 수, 스택 사이즈);
1 | #define osThreadDef(name, priority, instances, stacksz) | cs |
4~5 : LED_0을 위한 타이머 부분입니다.
osTimerDef 역시 cmsis_os.h에 define 되어있습니다.
osTimerDef(타이머 이름, 타이머 콜백함수이름);
1 | #define osTimerDef(name, function) | cs |
7~21 : blinky_thread 함수
osEvent, osSignalWait, osEventSignal등은 cmsis_os.h에 define 되어있습니다.
osEvent는 구조체로 event발생여부, message나 mail등 각종 상태등을 알 수 있는 것 같습니다.
1 2 3 4 5 6 7 8 9 10 11 12 | typedef struct { osStatus status; ///< status code: event or error information union { uint32_t v; ///< message as 32-bit value void *p; ///< message or mail as void pointer int32_t signals; ///< signal flags } value; ///< event value union { osMailQId mail_id; ///< mail id obtained by \ref osMailCreate osMessageQId message_id; ///< message id obtained by \ref osMessageCreate } def; ///< event definition } osEvent; | cs |
osSignalWait은 thread가 원하는 상태가 될때까지 기다리는 역할을 하고요.
osSigalWait(어떠한 상태(기다리는 상태), 타임아웃);
1 | os_InRegs osEvent osSignalWait (int32_t signals, uint32_t millisec); | cs |
osEventSignal은 osSignalWait의 return값중 하나입니다.
1 2 3 4 5 6 7 8 9 10 11 12 13 14 15 16 17 | typedef enum { osOK = 0, ///< function completed; no error or event occurred. osEventSignal = 0x08, ///< function completed; signal event occurred. osEventMessage = 0x10, ///< function completed; message event occurred. osEventMail = 0x20, ///< function completed; mail event occurred. osEventTimeout = 0x40, ///< function completed; timeout occurred. osErrorParameter = 0x80, ///< parameter error: a mandatory parameter was missing or specified an incorrect object. osErrorResource = 0x81, ///< resource not available: a specified resource was not available. osErrorTimeoutResource = 0xC1, ///< resource not available within given time: a specified resource was not available within the timeout period. osErrorISR = 0x82, ///< not allowed in ISR context: the function cannot be called from interrupt service routines. osErrorISRRecursive = 0x83, ///< function called multiple times from ISR with same object. osErrorPriority = 0x84, ///< system cannot determine priority or thread has illegal priority. osErrorNoMemory = 0x85, ///< system is out of memory: it was impossible to allocate or reserve memory for the operation. osErrorValue = 0x86, ///< value of a parameter is out of range. osErrorOS = 0xFF, ///< unspecified RTOS error: run-time error but no other error message fits. os_status_reserved = 0x7FFFFFFF ///< prevent from enum down-size compiler optimization. } osStatus; | cs |
14 : osEvent에 osSigalWait의 return값을 넣습니다.
16 : osEvent값이 osEventSignal이면 ,
18 : LED_1의 toggle을 실행합니다.
23~27은 타이머 콜백함수 입니다.
타이머가 시작되고 타임아웃이 되면 이 함수로 들어오게 됩니다.
26: LED_0을 toggle 합니다.
아래는 결과 영상입니다.
'Study > nRF51xxx(BLE)' 카테고리의 다른 글
| nRF51 DK 예제4 flashwrite (0) | 2015.03.02 |
|---|---|
| nRF51 DK 예제3 bsp (0) | 2015.02.27 |
| nRF51 DK 예제 1 LED blinky (2) | 2015.02.26 |
| nRF51 DK 비콘모드 설정 (0) | 2015.02.24 |
| nRF51 DK (2) | 2015.02.24 |

