이번에는 구글맵을 j query를 이용해서 띄어 볼께용.
그냥 일반적인 구글맵은 앞의 포스트를 참고하세용. GEOLOCATION for Google Maps JavaScript V3
First, 준비하기
일단은 라이브러리를 받아야 합니다. >> library.
다운을 받으신 후 압축을 푸세용.
여기서 필요한건 ui폴더인데 폴더채로 작업하시는 폴더에 복사해주세용.
Second, 코딩하기.
먼저 기본 자바스크립트 입니다. 필수!!
1 2 3 4 | <!--jquery-ui-map--> <script type="text/javascript" src="http://maps.google.com/maps/api/js?sensor=true"></script> <script type="text/javascript" src="ui/min/jquery.ui.map.full.min.js"></script> <script type="text/javascript" src="ui/jquery.ui.map.extensions.js"></script> | cs |
그리고 레이아웃이죠? 보여질 부분!!
1 2 3 4 5 6 7 8 9 10 11 12 13 14 15 16 17 18 | <body> <div data-role="page" id="page" data-fullscreen="true" class="map_style"> <div data-role="header" data-position="fixed"> <h1>map page</h1> </div> <div data-role="content" class="map_style"> <div id="map_canvas" class="map_style" > </div> </div> <div data-role="footer" data-position="fixed"> <div data-role="navbar"> <ul> <li><a href="#" data-icon="search" id="currentpos">current location</a></li> </ul> </div> </div> </div> </body> | cs |
여기서 중요한건 "map_style" 이라는 클래스를 추가시켜야 하는데
page(line 2), content(line 6), map(line 7) 이 3군데 모두 넣어야해용.
'Line 7' 은 맵을 나타내고, 'line 13' 은 현재위치 찾는 버튼을 의미합니다.
그리고 가장 중요한 맵을 구현할 코드입니다.
1 2 3 4 5 6 7 8 9 10 11 12 13 14 15 16 17 18 19 20 21 22 23 24 25 26 27 28 29 | <script type="text/javascript"> $(document).ready(function(e) { var startpos=new google.maps.LatLng(37.309,126.875); $("#map_canvas").gmap({ "center":startpos, "zoom":16 }); $("#currentpos").click(function() { $("#map_canvas").gmap("getCurrentPosition",function(position,status){ if(status=="OK"){ var latlng=new google.maps.LatLng( position.coords.latitude,position.coords.longitude); var marker="http://www.google.com/intl/en_us/mapfiles/ms/icons/blue-dot.png"; $("#map_canvas").gmap("get","map").panTo(latlng); $("#map_canvas").gmap("addMarker",{ "position":latlng, "icon":marker }).click(function(){ $("#map_canvas").gmap("openInfoWindow",{ "content":"<b>current location</b> <img src='http://images.forbes.com/media/lists/companies/google_200x200.jpg' alt=''/>"},this); }); }else{ alert("can't found location"); } }); }); });//ready </script> | cs |
복잡해보이지만 하나씩보면 쉬울꺼예용.
'Line 3' 은 초기 좌표를 임의로 넣어준 겁니다. 처음 실행할때 나타내 줄 지도 좌표
'Line 4~7' 은 지도 옵션
'Line 8~26'은 현재위치 찾는 부분인데요
'Line 8' 은 클릭리스너라고 보시면 됩니다.
'Line 9' 는 위치찾기가 가능한지를 체크해서 가능하면 true를 리턴해줍니다.
웹에서는 잘안되던데 모바일에서 하기를 권장합니다.
'Line 10~21' 은 위치찾기가 가능할때 (true)일때 and 'line 22~24' 은 false일때 입니다.
'Line 11~12' 은 현재 위치(좌표를 얻어오는 부분이고요)
'Line 13' 은 마커(marker)에 관한 옵션
'Line 14~17' 은 현재위치와 marker를 지도에 같이 뿌려주는 부분입니다.
'Line 18' 은 마커에 관한 클릭리스너이구요
'Line 19~21' 은 마커를 클릭했을때 나올 정보창(info window)에 대한 부분입니다.
아~쉽죠?ㅋ
모바일로 실행해 보겠습니다.
네이티브 코드는 예전 포스팅에 들어가면 있습니다.
실행화면입니다.
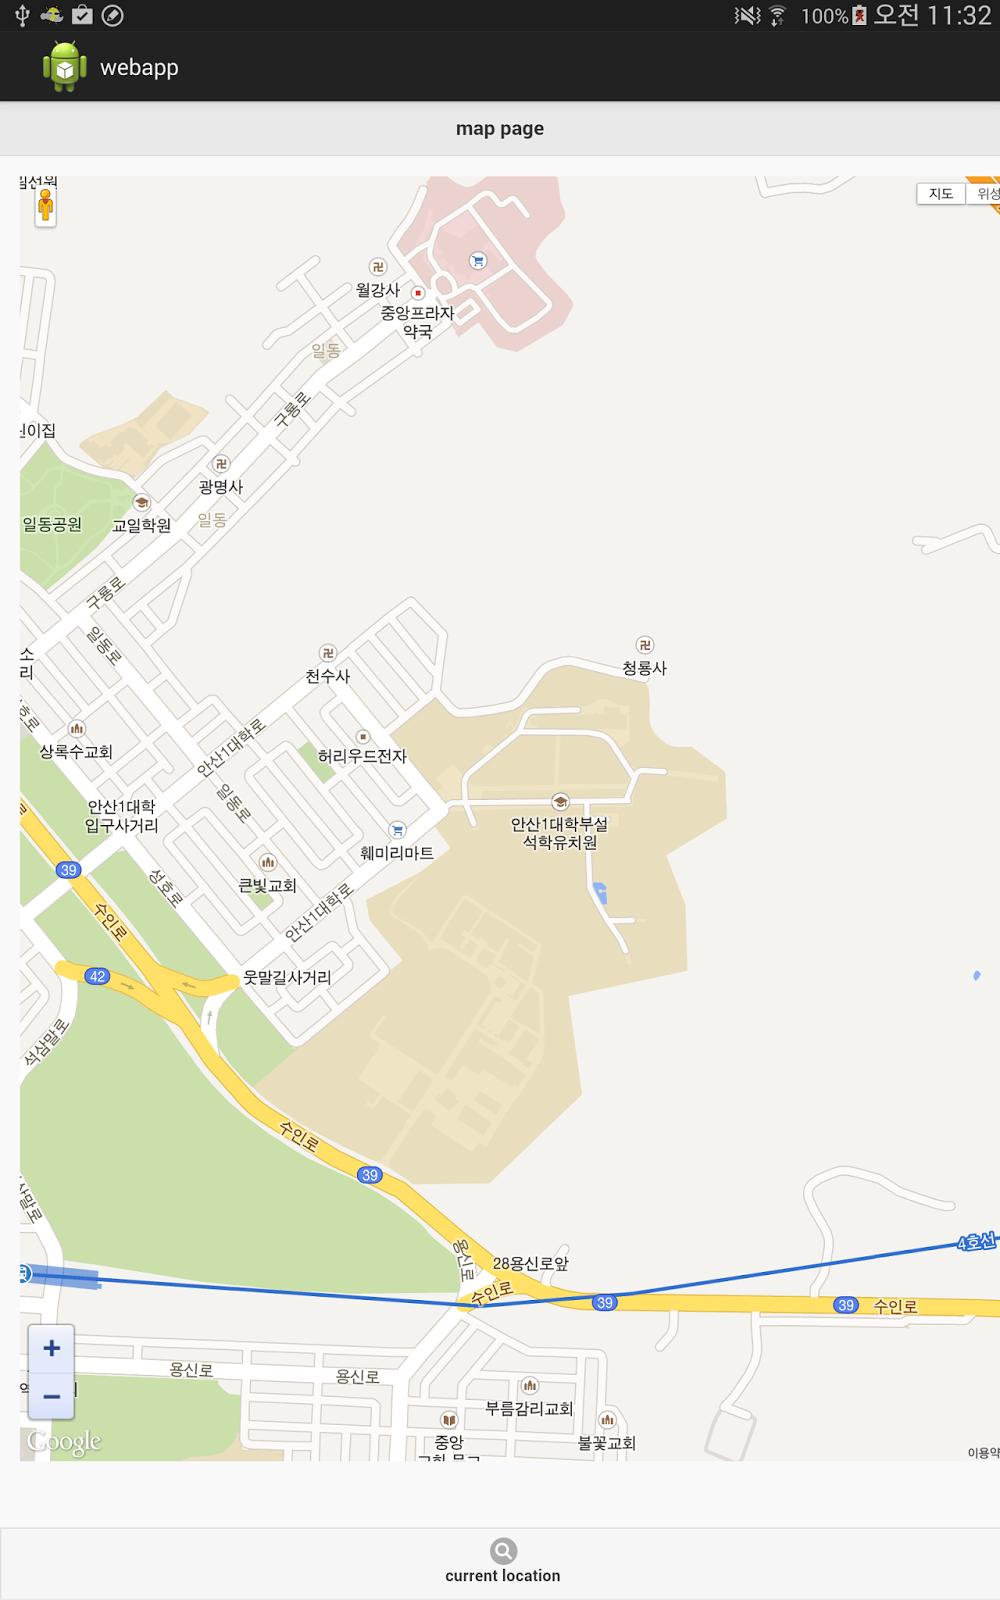
이게 초기 실행했을때 화면이구요.
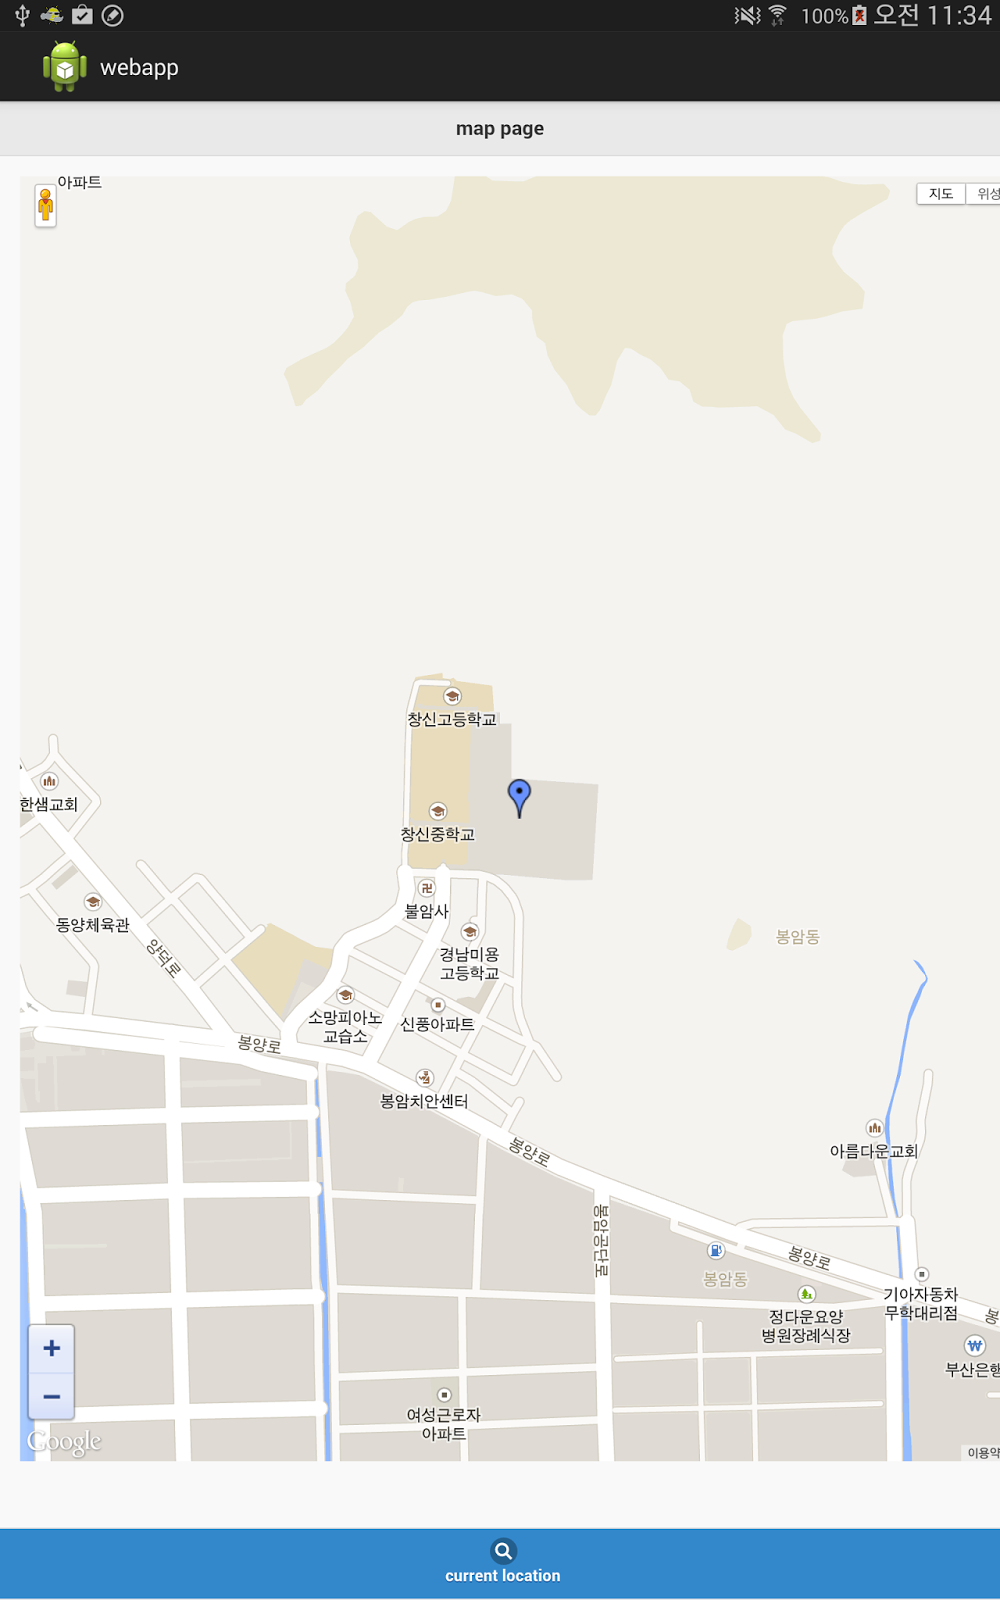
현재 위치찾기를 누르면 위와같이 찾습니다.
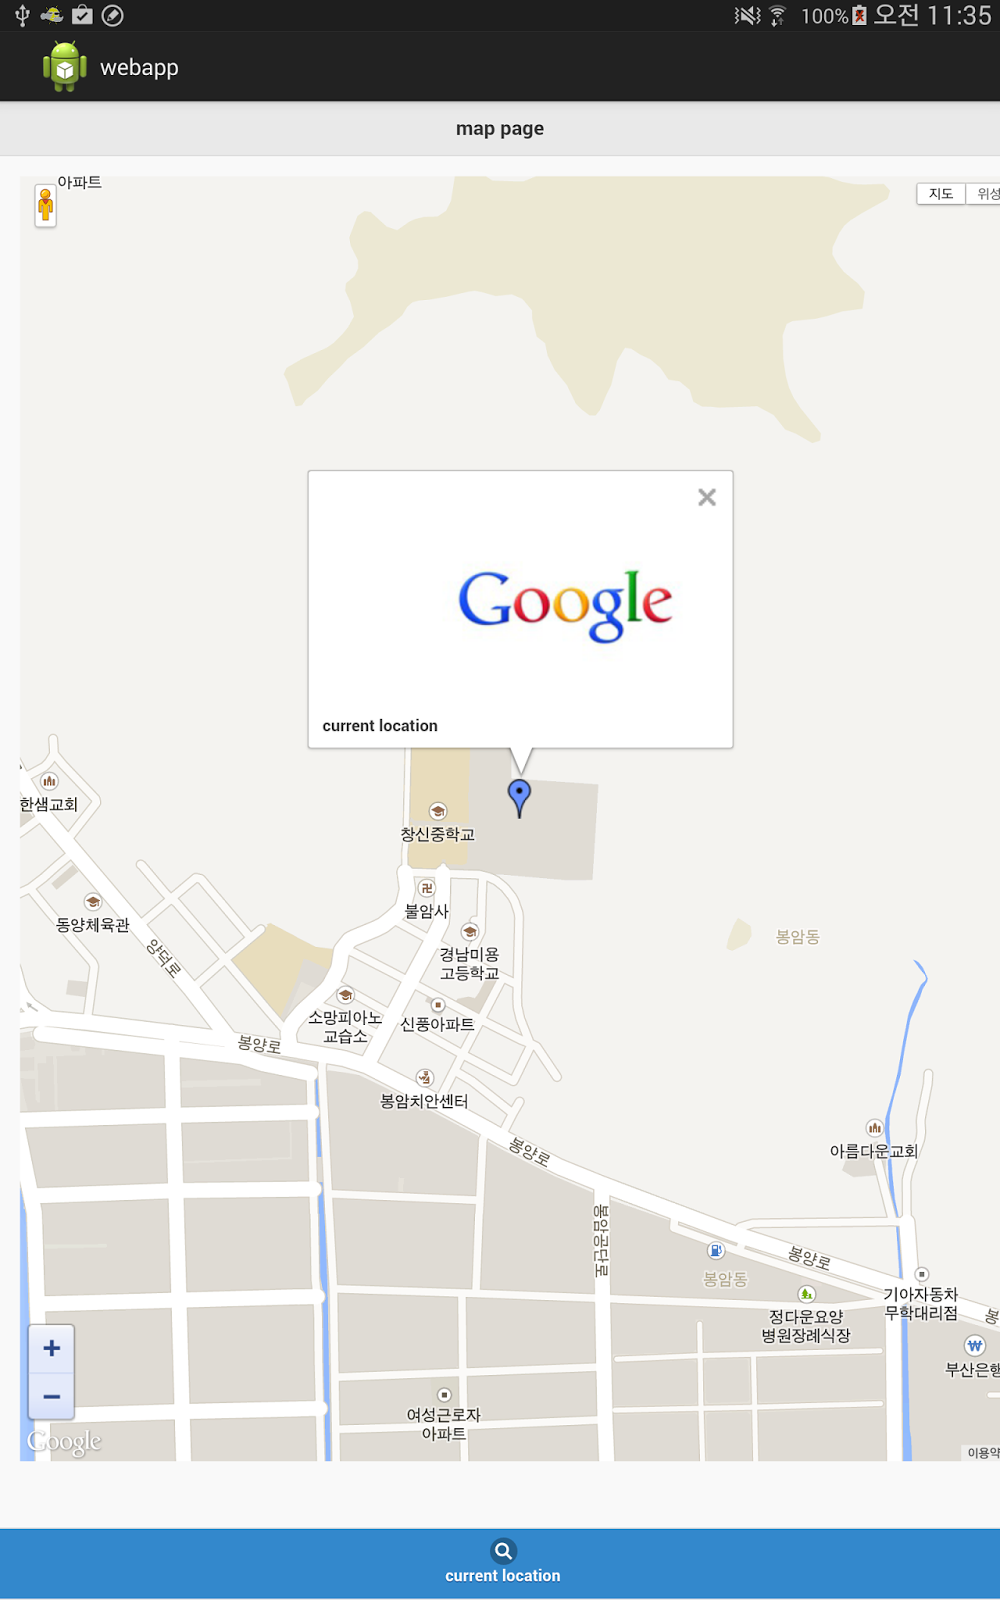
그리고 마커를 클릭하면 info window가 나오는데
Text와 image를 같이 뿌렸습니다.^^
'Study > HTML5+etc' 카테고리의 다른 글
| iframe 로 한페이지안에 여러개의 링크 띄우기 (0) | 2016.12.05 |
|---|---|
| HTML5 브라우저별 호환기능 볼 수 있는 사이트 (2) | 2016.11.28 |
| HTML(J-query, javascrpit) 이미지 크기조절 (0) | 2015.02.12 |
| PhotoSwipe로 gallery 만들기!! (0) | 2015.02.12 |
| JQuery Tip!! (0) | 2015.02.12 |

